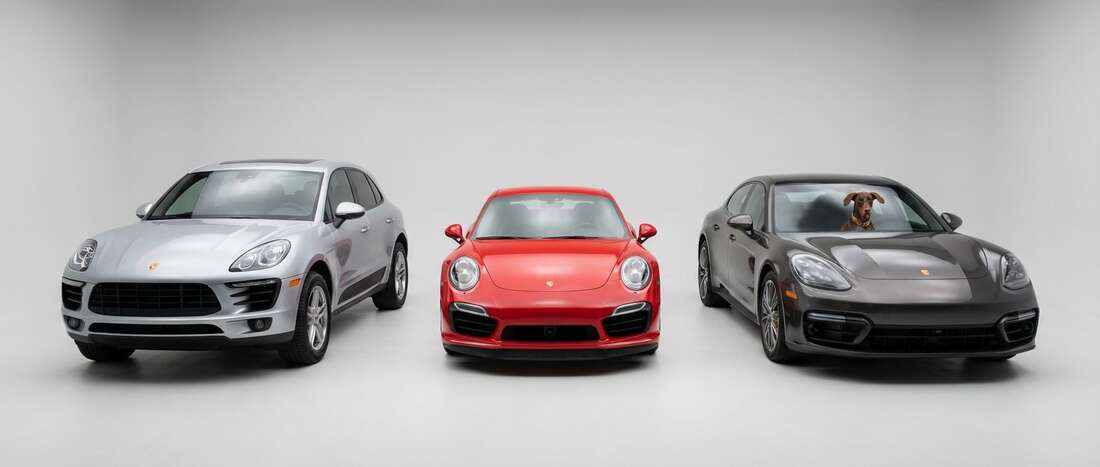
2013 Porsche Touch Up Paint (36 OEM Colors)
Search for your color
-
GT-Silver Metallic
PorscheGT-Silver Metallic (M7Z/U2)
🔥 Ordered 10 times recently -

Pure White
PorschePure White (C9A/0Q)
🔥 Ordered 6 times recently -
Meteor Gray Metallic
PorscheMeteor Gray Metallic (M7W/9Q)
🔥 Ordered 5 times recently -
Achate Gray Metallic
PorscheAchate Gray Metallic (M7S/N0)
🔥 Ordered 3 times recently -

Jet Black Pearl
PorscheJet Black Pearl (C9X/2T)
🔥 Ordered 3 times recently -
Acid Green
PorscheAcid Green (2M8)
🔥 Ordered 2 times recently -

Basalt Black Metallic
PorscheBasalt Black Metallic (C9Z/Z4)
🔥 Ordered 2 times recently -
Guards Red
PorscheGuards Red (84A/G1)
🔥 Ordered 2 times recently -

Racing Yellow
PorscheRacing Yellow (1S1/P3)
🔥 Ordered 2 times recently -

Amethyst Metallic
PorscheAmethyst Metallic (M4Z/N6)
🔥 Ordered 1 times recently -

Aqua Blue Metallic
PorscheAqua Blue Metallic (M5R/32B)
🔥 Ordered 1 times recently -

Black
PorscheBlack (741/A1)
🔥 Ordered 1 times recently -

Carbon Gray Metallic
PorscheCarbon Gray Metallic (M9Z/1A)
🔥 Ordered 1 times recently -
Classic Silver Metallic
PorscheClassic Silver Metallic (X7W/P5)
🔥 Ordered 1 times recently -

Karmin Red
PorscheKarmin Red (M3C/0L)
🔥 Ordered 1 times recently -
Mahogany Metallic
PorscheMahogany Metallic (M8Y/Y8)
🔥 Ordered 1 times recently

For small chips & scratches
Customized Color Paint Pen
Repair tiny chips and scratches with precision. Perfect for small nicks from rocks or door dings, the fine tip applicator makes it easy for beginners to achieve a clean, factory-quality finish.

For Medium-sized Chips & Scratches
Customized Color Paint Bottle
Tackle medium-sized scratches and chips with our Customzied Color Paint Bottle. The built-in applicator brush provides smooth, controlled coverage, while the included basecoat delivers a perfect factory match in your custom paint color.

For larger areas & panel resprays
Customized Color Spray Can
Cover larger areas with a smooth, professional finish using ourcustomized color Spray Can. Designed for hoods, fenders, and larger scratches, this product provides consistent spray coverage and factory-matched color accuracy.

For large repairs & total resprays
Customized Color Professional Size Paint
When your repair job calls for more than a touch-up, step up to our professional-size automotive paints. Available in Pint, Quart, or Gallon sizes, these paints are ready-to-spray using an airless spray gun.

For small chips & scratches
Customized Color Tricoat Paint Pens
Repair tiny chips and scratches with precision. Perfect for small nicks from rocks or door dings, the fine tip applicator makes it easy for beginners to achieve a clean, factory-quality finish. Each order includes a basecoat and a midcoat pen.

For Medium-sized Chips & Scratches
Customized Color Tricoat Paint Bottles
Tackle medium-sized scratches and chips with our Customzied Color Paint Bottles. The built-in applicator brush provides smooth, controlled coverage, while the basecoat & midcoat deliver a perfect factory match in your custom paint color.

For larger areas & panel resprays
Customized Color Tricoat Spray Cans
Cover larger areas with a smooth, professional finish using our customized color basecoat & midcoat Spray Cans. Designed for hoods, fenders, and larger scratches, this product provides consistent spray coverage and factory-matched color accuracy.
For large repairs & total resprays
Customized Color Tricoat Professional Size Paint
When your repair job calls for more than a touch-up, step up to our professional-size automotive paints. Available in Pint, Quart, or Gallon sizes, these paints are ready-to-spray using an airless spray gun. Each order includes a basecoat & a midcoat paint.
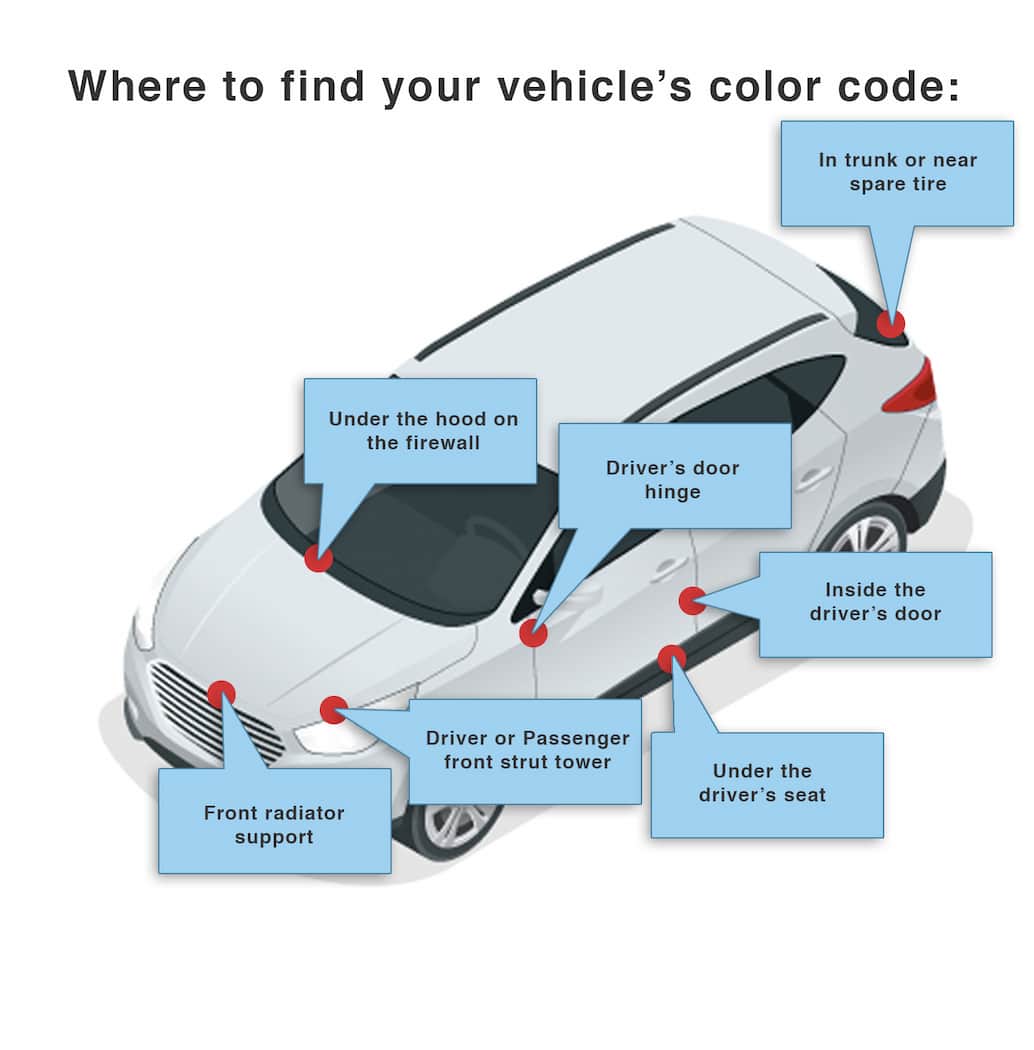
How to Find Your 2013 Porsche's Color Code
Porsche paint codes are often hard to find. They are usually near the spare tire area, printed on a paper color ID tag that may fall off with time. The owner's manual for some models sometimes lists paint codes. Porsche uses the same color across different models, and the same code may appear under different color names. Codes can be four characters starting with L or three characters, using letters and numbers.