Travel Motorhome Touch Up Paint (6 OEM Colors)
Search for your Motorhome's color
-

Dark Brown (PPG 5227)
TravelDark Brown (PPG 5227) (52976)
🔥 Ordered 1 times recently -
Sahara Sand (PPG 28415)
TravelSahara Sand (PPG 28415) (53907)
🔥 Ordered 1 times recently -

Cranberry
TravelCranberry (53908)
-
Medium Suede (PPG 4817)
TravelMedium Suede (PPG 4817) (48507)
-
Warm Gray
TravelWarm Gray (57714)
-

Cool Beige
TravelCool Beige (62261)
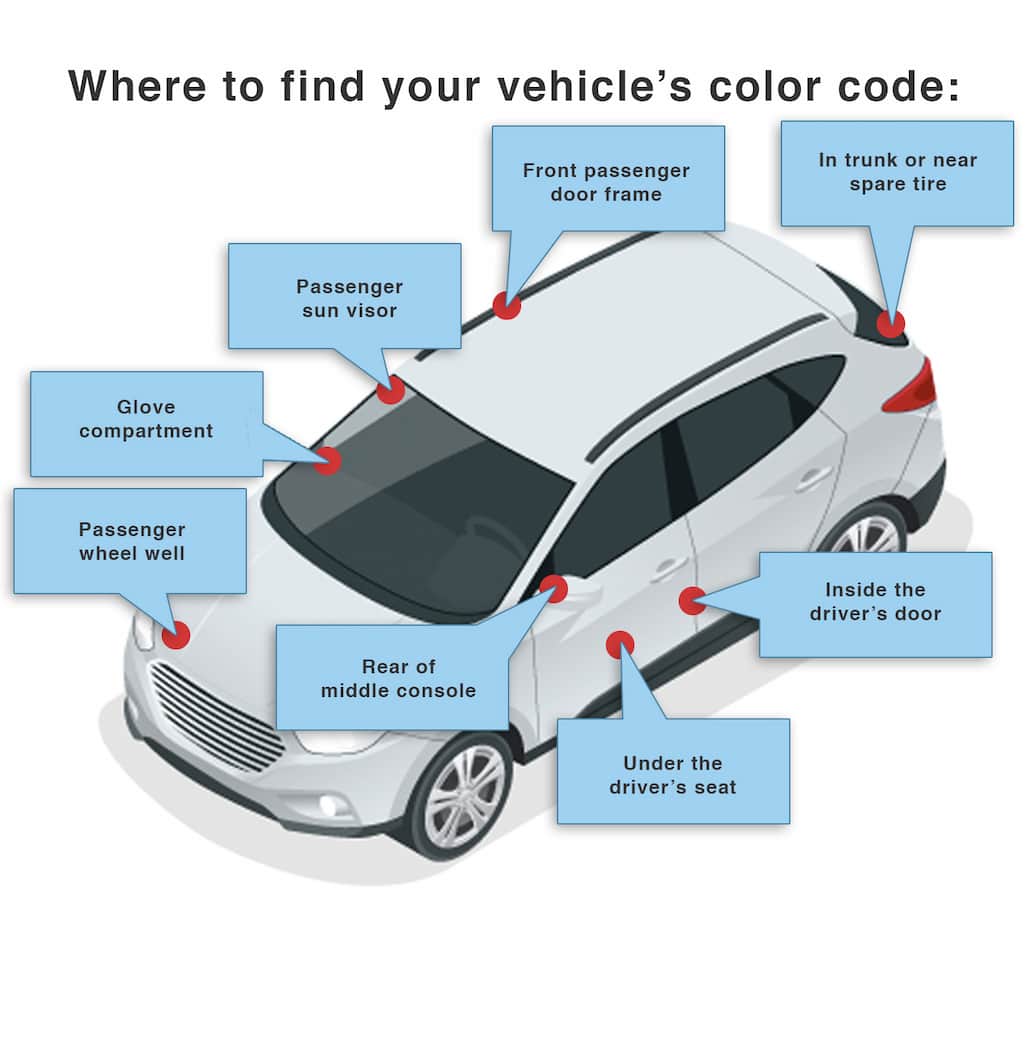
How to Find Your Travel Motorhome's Color Code
Travel paint color code location is obtained by contacting Travel: call to ask where the Travel color code can be found. If there is no color code, ask whether they know the PPG or Dupont (Axalta) paint formula number. The method relies on Travel for location details and, when absent, for the PPG or Dupont (Axalta) formula identifiers.